
Creating a Custom Report
1. Navigate To Reports
Before you can start creating your user report, you will need to Navigate to reports
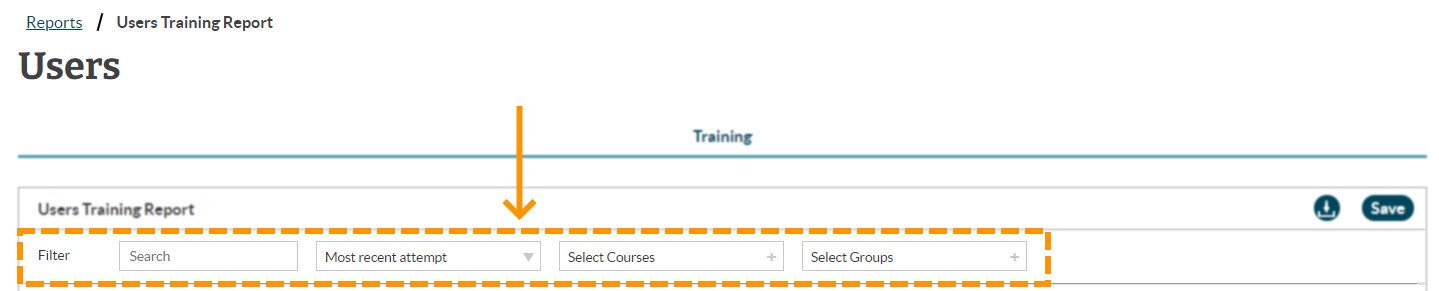
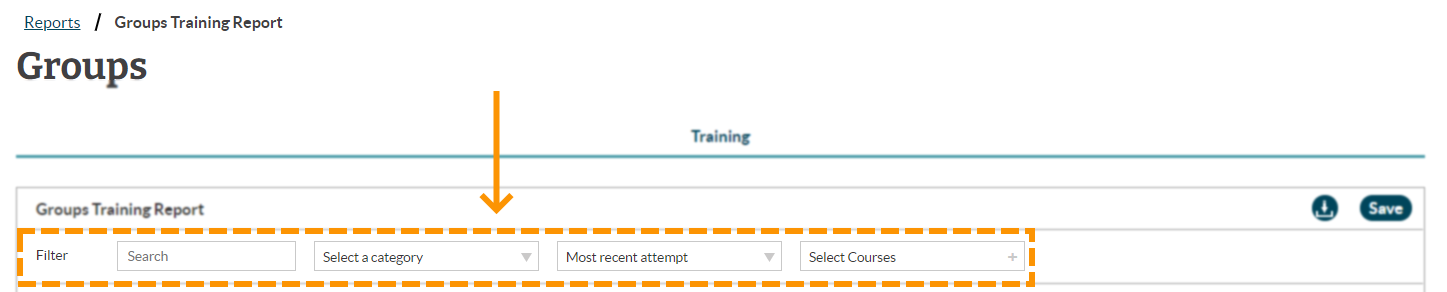
2. Filtering
Users, groups and courses, all give you the option to filter the tables based on what you want.

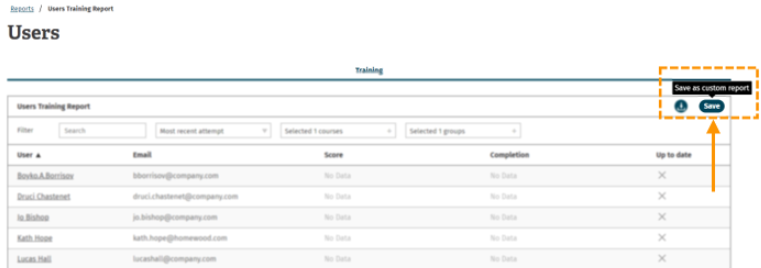
3. Save
Once you have filtered/customised your report, you can save it by clicking on the 'save' button.
Regardless of what report you are customising (users, groups or courses), the save button can be found in the right hand corner of the table. It will be to the right of the 'download' button.
In the example below, we use the 'users' report.
Enjoyed using our product?
Help us out by leaving a review for on Gartner Peer Insights!
It only takes 5 minutes of your time and every review helps us immensely to reach new clients. Thank you so much.