Deliver phishing simulations via the Microsoft 365 API
If you use Microsoft 365 for your email then delivering phishing simulations via the Microsoft 365 API will simplify whitelisting. This is because, the simulations will bypass any email gateways and spam filters that you have in place.
You can enable delivery via Microsoft 365 API on a per-domain basis.
1. Add and verify target domain
First, you must add and verify the target domain. This guide will walk you through those steps.
2. Create an enterprise application in Microsoft Entra
2.1. Log in to the Microsoft Entra admin center.
2.2. In the sidebar, navigate to “Applications -> Enterprise applications”.
2.3. Click "+ New Application"
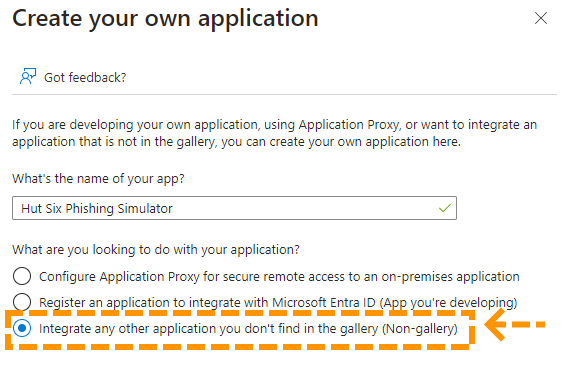
2.4. Select “Non-gallery application”, give the application a name (e.g. “Hut Six Phishing Simulator”), and click Create.
3. Grant required API permissions
3.1. In the Microsoft Entra admin center sidebar, navigate to “Applications -> App registrations”. Then click on “All applications” tab.
3.2. In the list of applications, find the application you created in the previous section and click on it.
3.3. Under “Manage”, navigate to “API permissions” and click the “Add a permission” button.
3.4. Select Microsoft Graph, then select Application permissions.
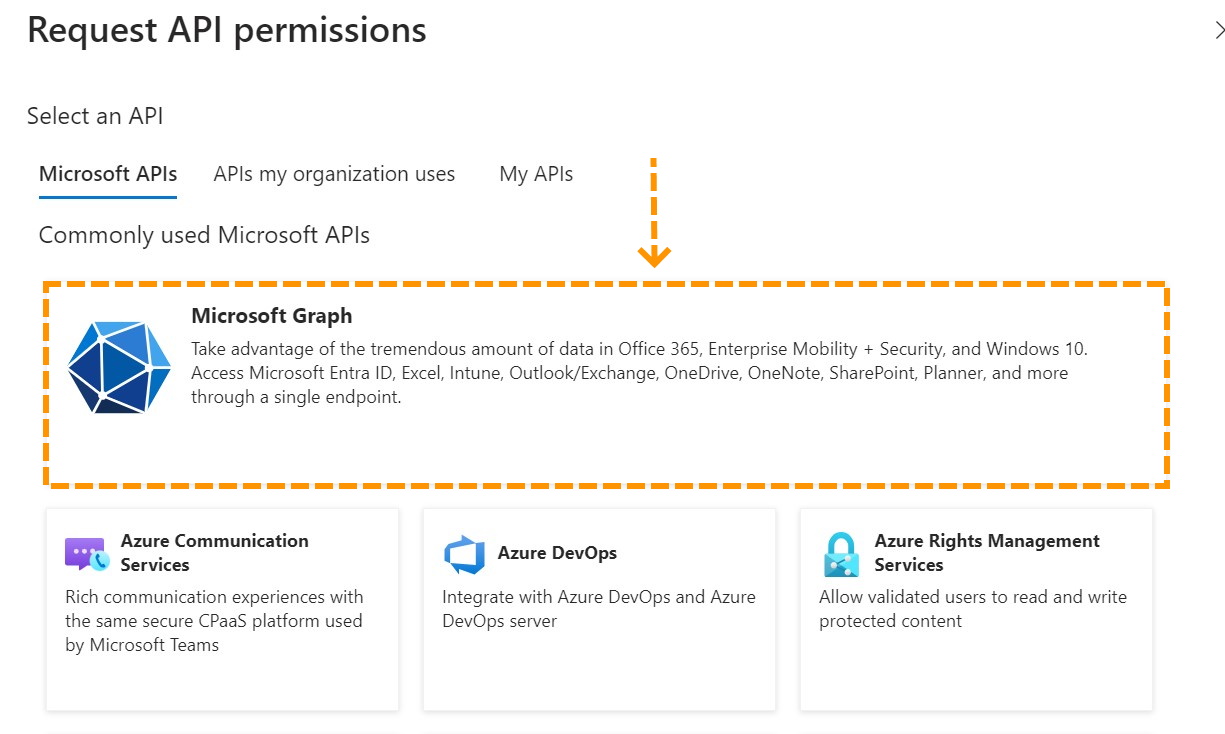
3.5. Add the following permissions:
- Mail.ReadWrite
- Mail.Send
- MailboxFolder.ReadWrite.All
- User.ReadBasic.All
3.6. Once you’ve added the permissions, click the Grant admin consent button.
4. Create an application secret and add it to the target domain in Hut Six
4.1. In the Microsoft Entra admin center sidebar, navigate to “Applications -> App registrations”. Then click on “All applications” tab.
4.2. In the list of applications, find the application you created in the previous section and click on it.
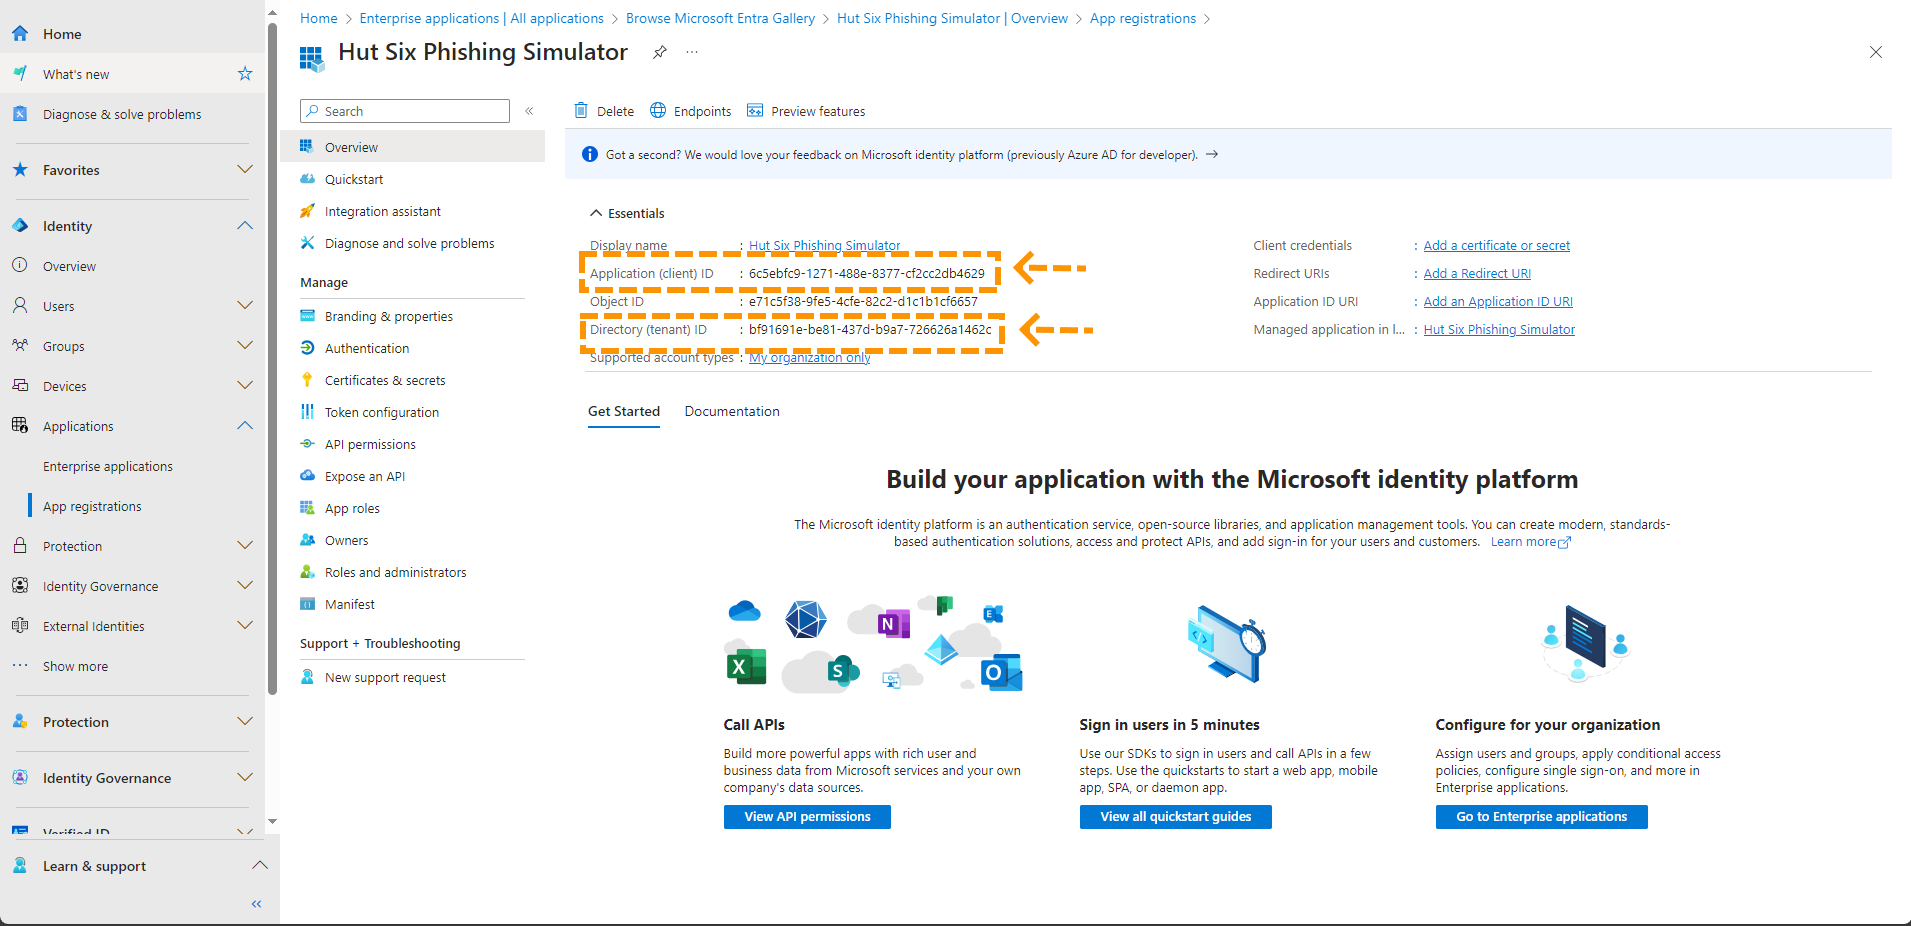
4.3. You will now see the overview page for that application. Take a note of the Application (client) ID and the Directory (tenant) ID, you will need it later.
4.4. Under “Manage”, navigate to Certificates & secrets.
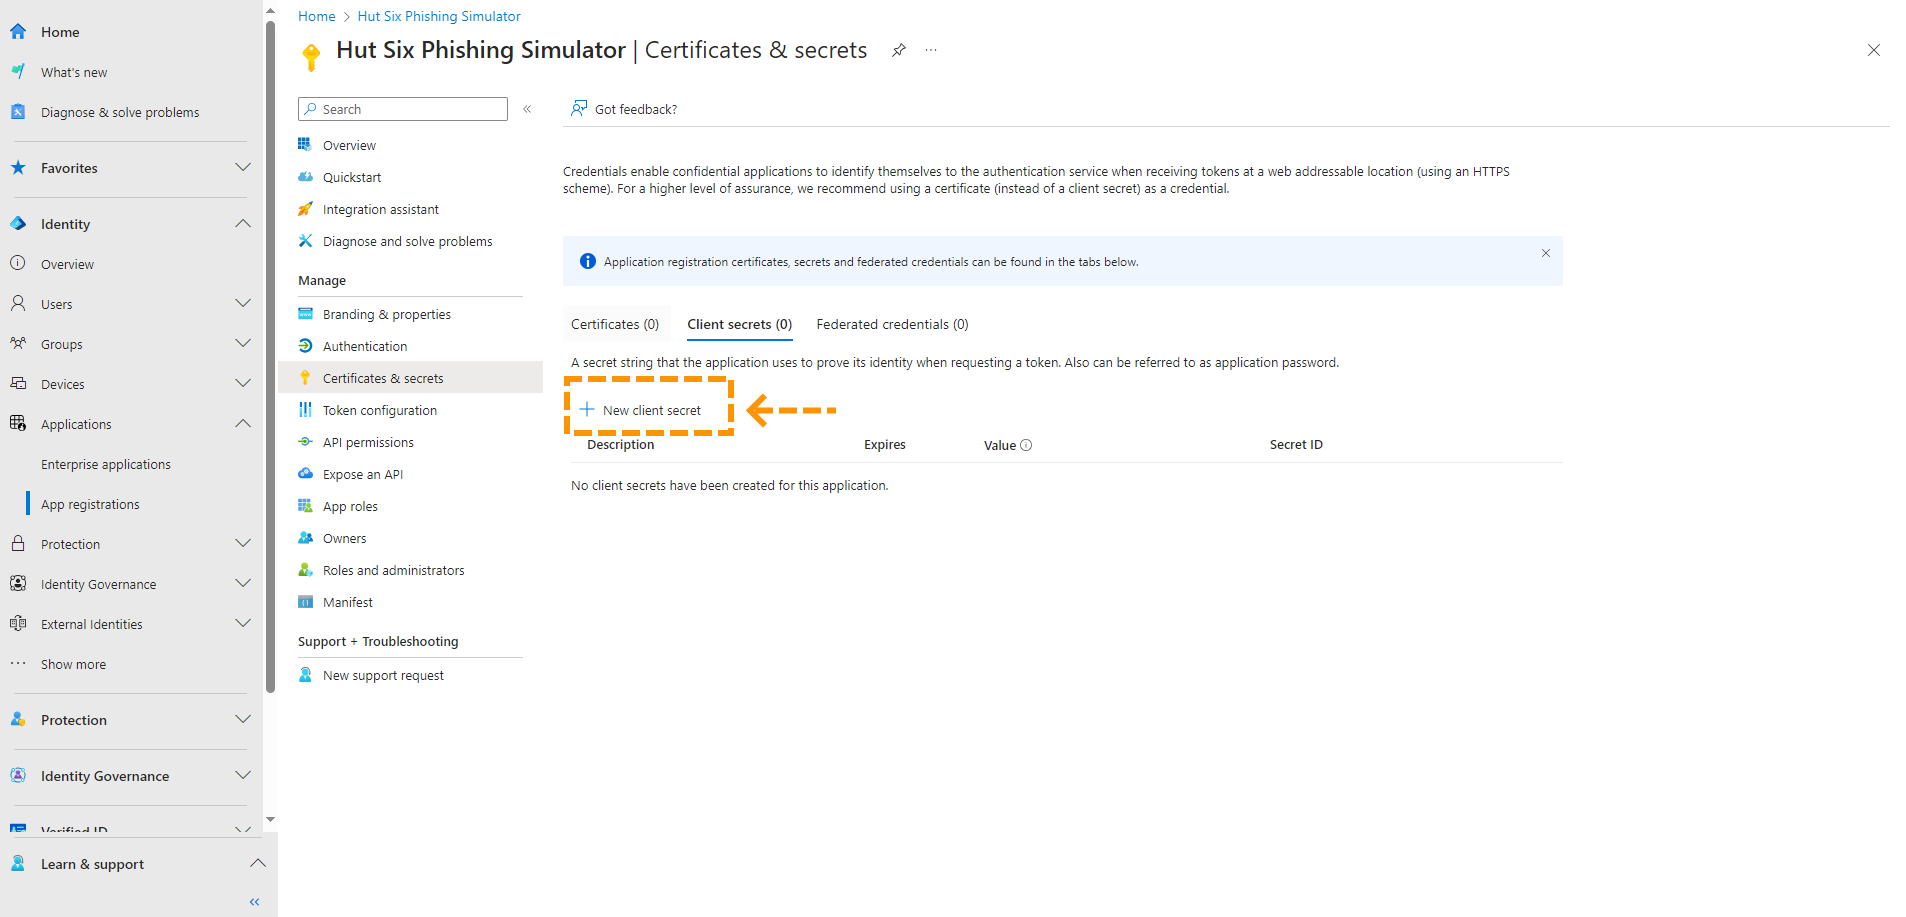
4.5. Click on “New client secret”. Give your secret a name and click “Add”. Take a note of the expiry date, as you will need to create a new client secret before then for the Hut Six Phishing Simulator to continue to operate.
4.6. Open a new tab and go to the Hut Six platform. Navigate to Mange -> Phishing -> Target Domains.
4.7. Click on the edit icon for the target domain you created earlier.
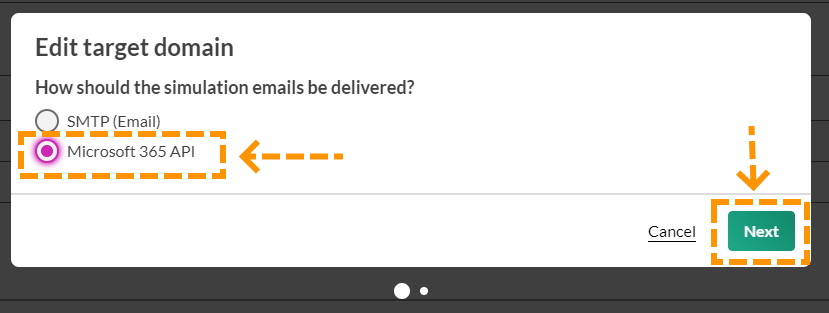
4.8. In answer to “How should the simulation emails be delivered”, select “Microsoft 365 API” and then click “Next”.
4.9. Copy the “Application (client) ID” and “Directory (tenant) ID” that you made not of earlier into the corresponding fields.
4.10. Go back to the Microsoft Entra tab and copy the “Value” for the secret you created and paste it into the “Secret Value” field in the Hut Six tab.
4.11. Click confirm. Phishing simulations for users with that target domain will now be delivered using the Microsoft 365 API.
Enjoyed using our product?
Help us out by leaving a review for on Gartner Peer Insights!
It only takes 5 minutes of your time and every review helps us immensely to reach new clients. Thank you so much.
