
How to do a User Bulk Upload
To bulk upload users you'll need to create a CSV file with specific columns (First Name, Last Name, Email) as a minimum. Make sure groups are created in the LMS before uploading your users. Upload the CSV file, selecting options if you want to update existing users or manage group memberships during the upload. Finally, confirm the upload.
Adding users is a vital step when setting up your LMS. You can choose between bulk uploading users using a CSV file or you can add users individually.
Below you will be shown how to bulk upload users. If you want to add users individually, refer to the ‘Adding users individually’ article.
For the purpose of this explanation, we will be using our fictional company ‘Homewood’. In your case, your LMS will be related to your company.
Before you can start bulk uploading users, you will need to Navigate To Users
Note: Before you can bulk upload users, you will need to create a CSV file that contains the necessary information. The groups that you want the users added to need to be created before the bulk user upload or the upload won’t work.
To find out how to set this up, refer to the [Bulk Adding groups or adding groups individually] article.
The information that you will need in the user CSV upload is:
- FirstName
- LastName
- Category (can be found in groups)
- Name (can be found in groups)
Category: This is the name of the group (e.g. department, team, remote working)
Name: This is the name of the category that relates to the group (e.g. IT support, HR, Contractors, Marketing)
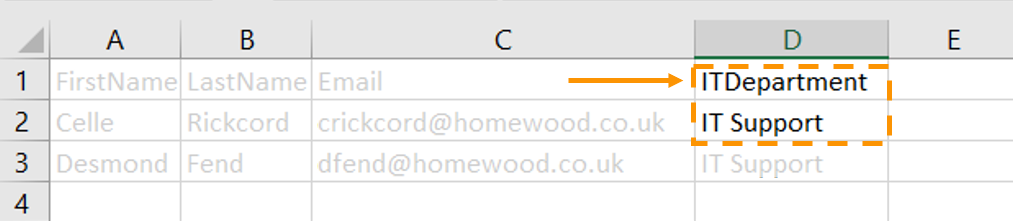
In the example below we have the following:
- FirstName: Celle
- LastName: Rickcord
- Email: crickcordk@nhs.uk
- Category: IT Department
- Name: IT support

Note:
Ensure that the CSV file that you create follows the format as stated above.
There should be no gaps between the headings (e.g. FirstName) as this will cause an error and you won’t be able to successfully upload your file.
To bulk upload your users, click on the bulk upload icon which can be located in the right-hand corner of the user management table.

You will then be taken to the upload CSV page.
From here you will be able to upload the CSV file that was previously created.
- Click on the ‘choose file’ button to upload your CSV file.
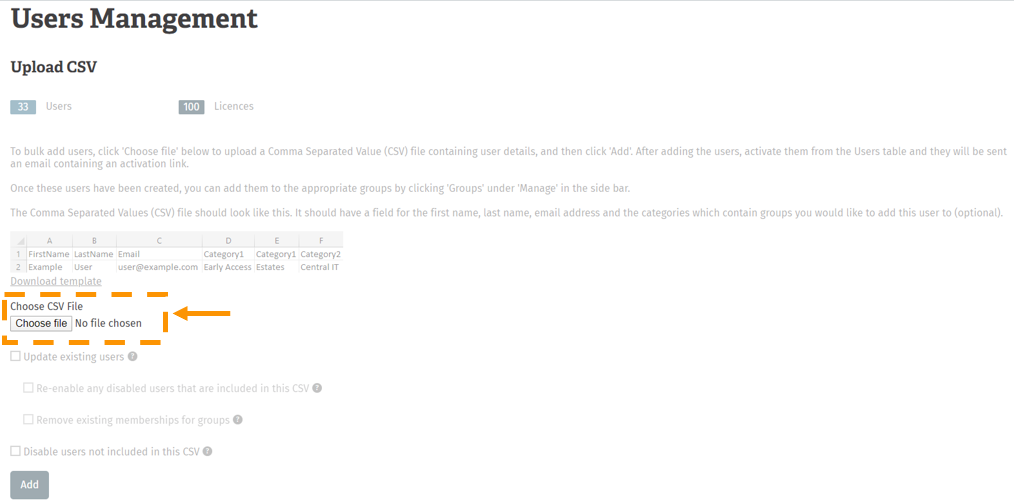
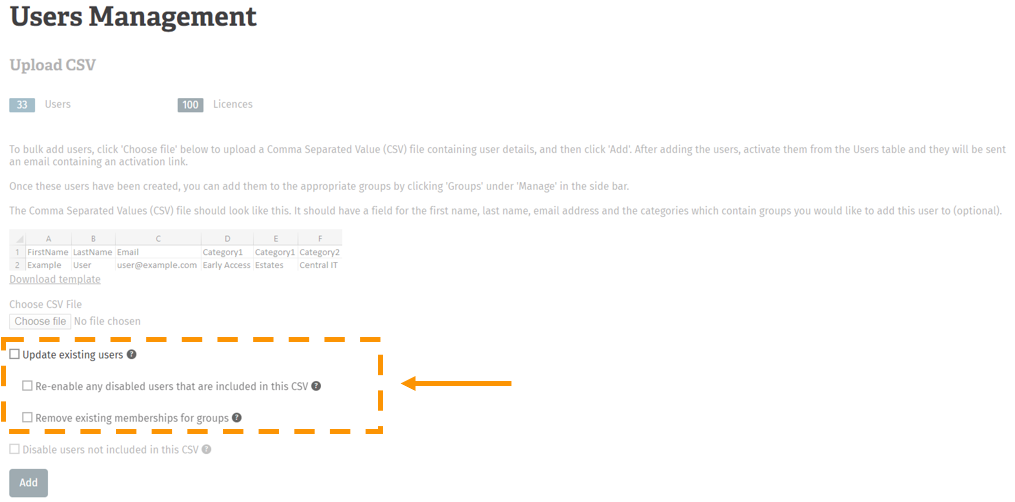
Below the CSV file upload button, there is a box asking if you want to 'update existing users'.
The box is always automatically unchecked. However, if the box is checked, then existing users' details will be updated from the CSV file upload.
If the box is checked then you also have the option to:
Re-enable any disabled users that are included in this CSV. If this box is checked, existing users who are currently disabled and are present in the CSV file, will be set to enabled.
Remove existing memberships for groups. If this box is checked, users within the CSV will be removed from all groups that they are usually a part of. They will still be added to the groups specified in the CSV file. This is a useful feature if users have changed departments.
Users accounts are matched by the users' email address.
In this example, the boxes remain unchecked.
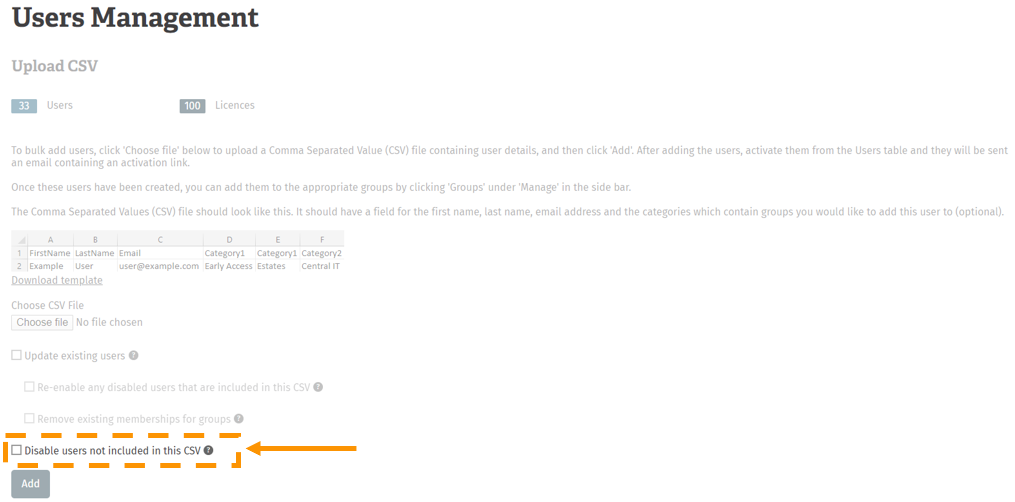
The final box that you will come to before you can add your CSV file upload is the Disable users not included in the CSV checkbox.
If this box is checked, then the users that are currently on the LMS, but not present in the CSV file will be disabled. This box should only be checked if the CSV file includes ALL users that should have access to the LMS.
Users will be matched using their email addresses.
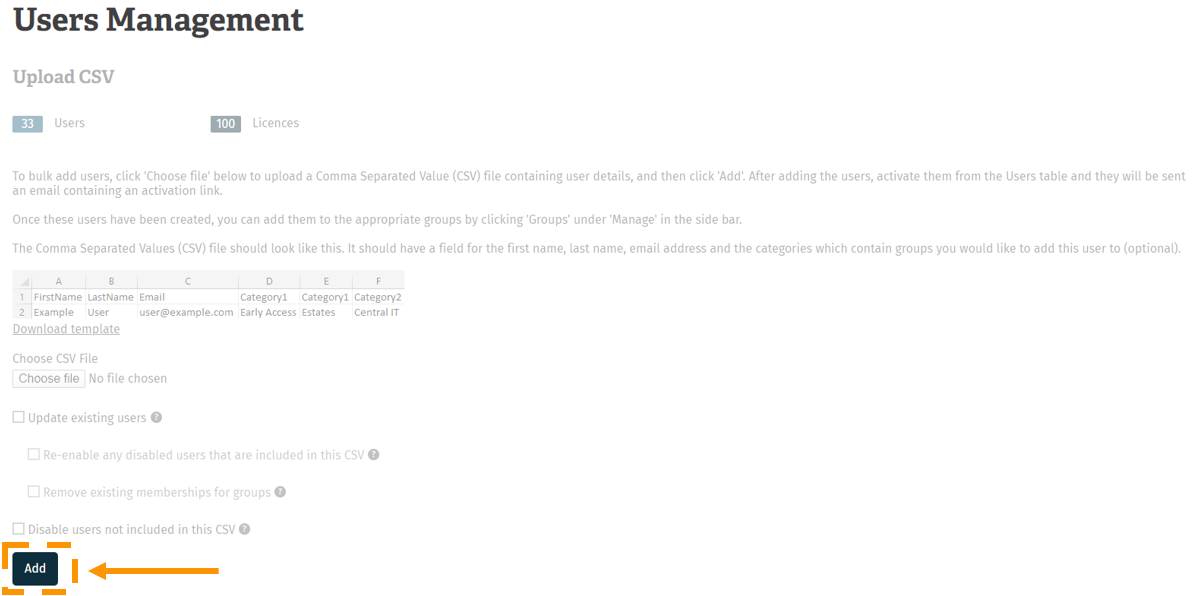
The last step to uploading the CSV file is to click ‘Add’ to confirm your user upload.
Enjoyed using our product?
Help us out by leaving a review for on Gartner Peer Insights!
It only takes 5 minutes of your time and every review helps us immensely to reach new clients. Thank you so much.