
How to Add Individual Users

To add a single user in Hut Six, go to the 'Users' section, click 'Add', fill in the user's name and email, select their role, choose whether to send an activation email immediately, and then click 'Create'.
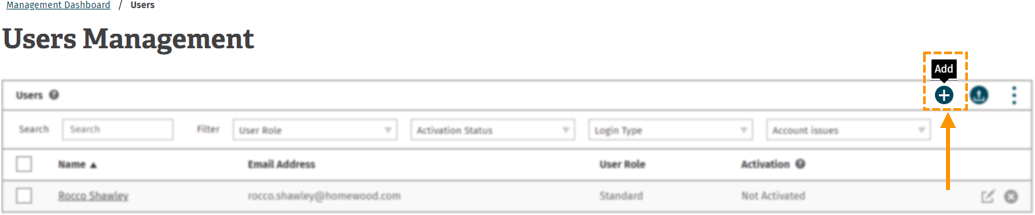
Before you can start adding users individually, you will need to Navigate To Users.
To start adding users individually, select the ‘add’ button which can be found at the right of the user management table.
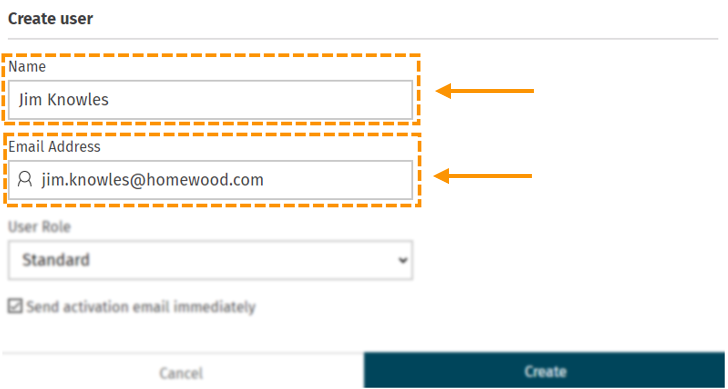
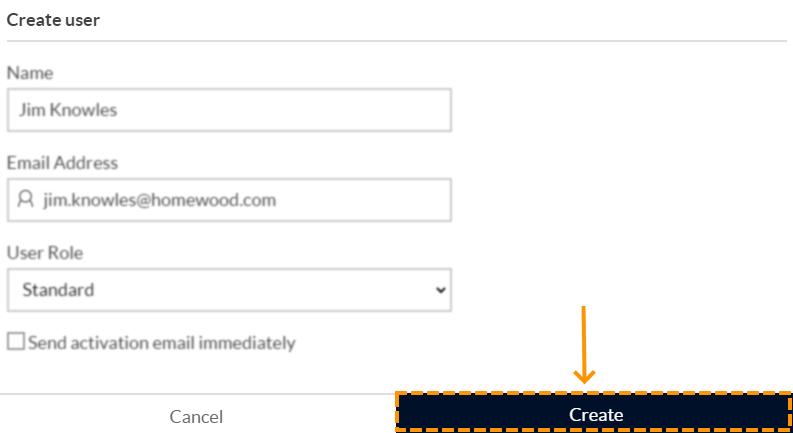
You will then be presented with a user creation box. In order to add users to the LMS, ensure that the name & email address are both filled in.
You will then be asked to set the user role. Click on the drop-down menu to select the user role.
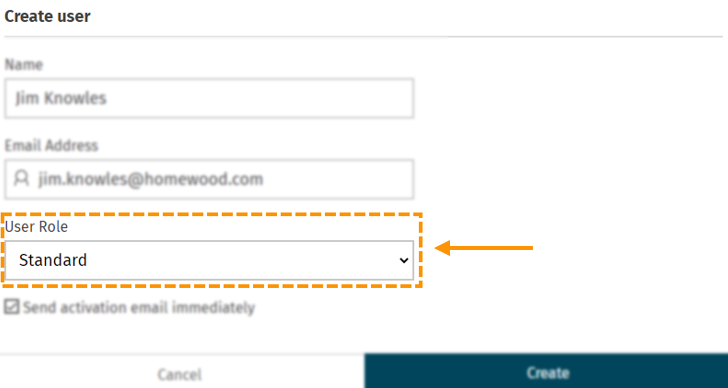
You can find the breakdown of different user roles here:
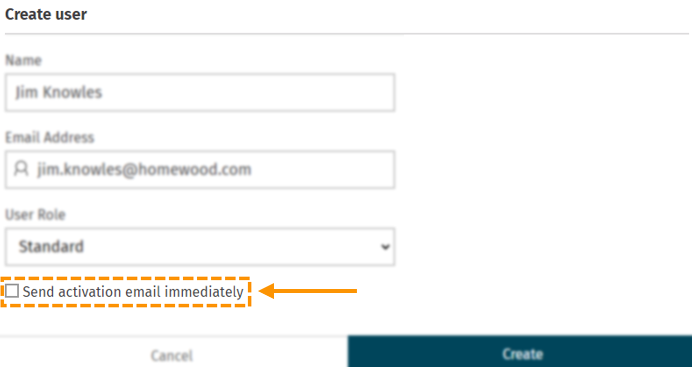
Before you create a user, you must decide if you want to 'send the activation immediately' or not.
The 'send activation immediately' is automatically ticked when you go to create a new user individually. This means that as soon as you click 'create' the user you have added will be sent an activation email.
If you do not want an activation email to be sent to the user straight away; de-select the box.
In this example, the box has been de-selected.
Once you are happy with the information you have filled in - click create.
This will then create the user for you.
Enjoyed using our product?
Help us out by leaving a review for on Gartner Peer Insights!
It only takes 5 minutes of your time and every review helps us immensely to reach new clients. Thank you so much.