
SSO with Azure AD - Super User Group
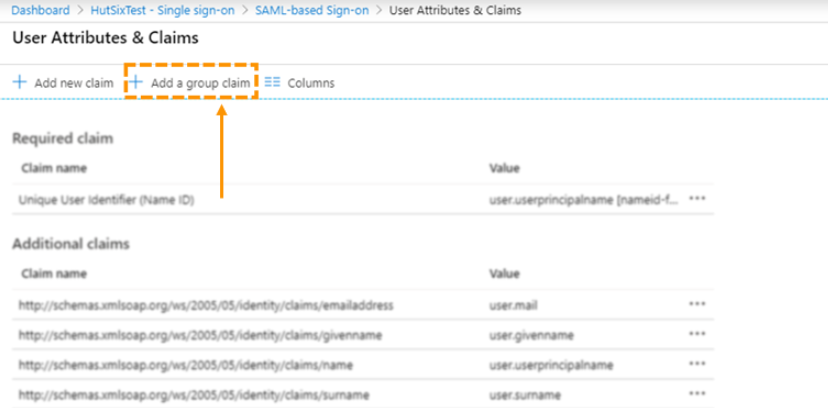
In the Hut Six Enterprise app, navigate to Single sign-on and then edit the “User Attributes & Claims”.
Click 'Add a group claim'.
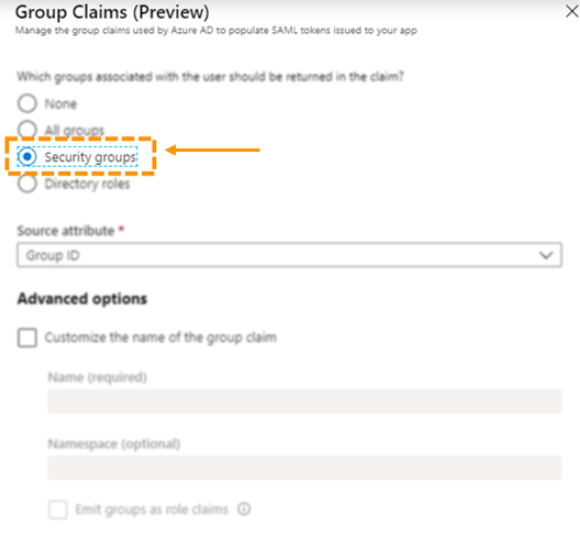
- Select Security groups, and then click 'save'.
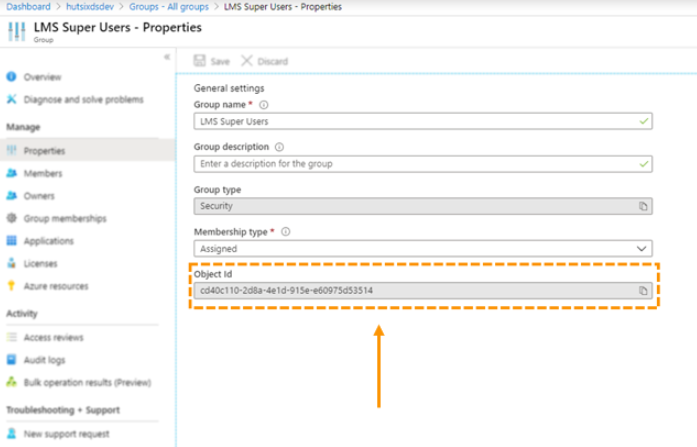
Navigate to the Groups section of the Azure Active Directory admin centre.
Create a new group for your Super Users and assign the correct members.
Copy the Object ID for the group.
On the Hut Six dashboard, navigate to the Group Mappings tab of Directory Services Settings.
Add a new group mapping. In the first field, paste the Object ID from Step 6. In the second, select Super User.
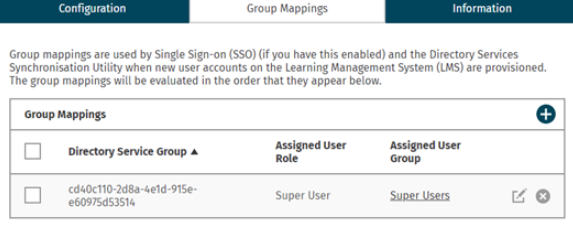
- The next time a member of the Azure AD Super Users group signs in, they will be assigned the Super User role.
Enjoyed using our product?
Help us out by leaving a review for on Gartner Peer Insights!
It only takes 5 minutes of your time and every review helps us immensely to reach new clients. Thank you so much.