
How to Activate Users
There are two ways to activate users: you can either activate a selected set of users or you can activate all users at once.
Activate Selected Users
1. Navigate To Users
Before you can start activating users, you will need to Navigate To Users.
2. Select Users To Activate
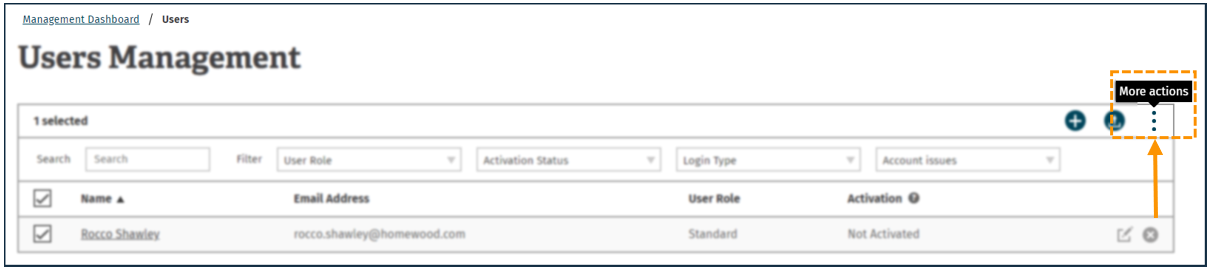
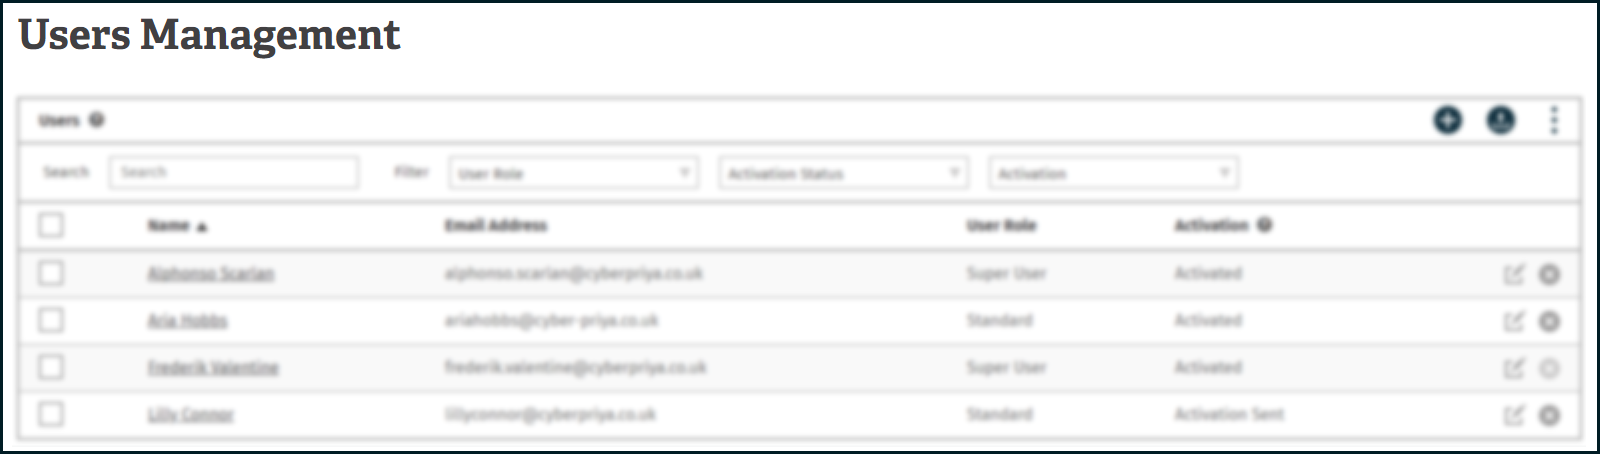
Once you have clicked users, you will be taken to the user management section. Here you will be presented with the user management table.
This is where you will be able to activate your users.
The next steps are for activating users individually. You may use this process if there have been new users added to the LMS and you only want to activate a few users rather than all the new users.
To do this, click the box next to the user name you would like to activate.

3. More Actions
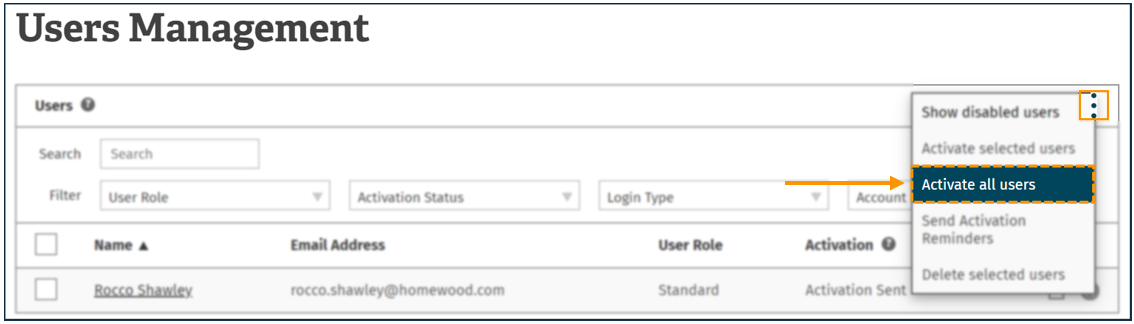
Once you have selected the user/users you would like to activate, click the 'more actions' (hamburger icon) that can be found at the top right of the user management table.
4. Activate Selected Users
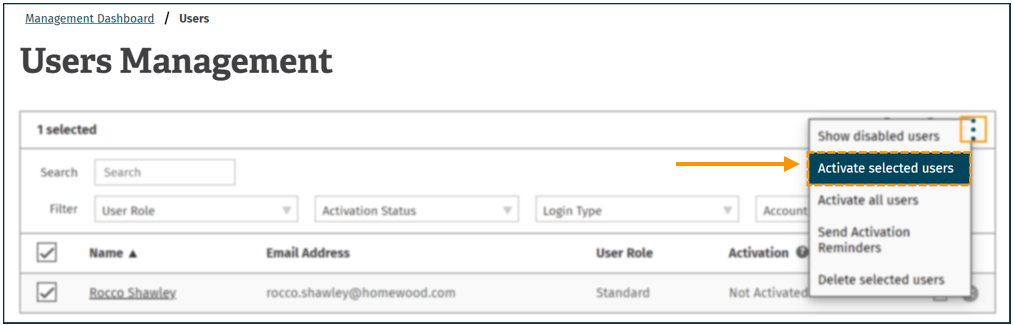
You will then be presented with a drop-down menu with the following options:
- Show disabled users
- Activate selected users
- Activate all users
- Delete selected users
Select ‘activate selected users’.
This only activates the users that you have selected. If you want to activate all the users on the LMS follow the instructions for “Activate all users” below.
5. Create
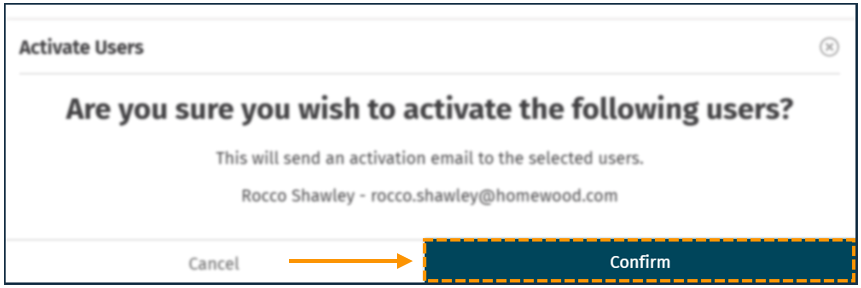
After clicking the activate selected users button, you will be asked if you are sure about activating this user.
Click 'Confirm' to activate this user.
Activating All Users
1. Select Users To Activate
Once you have clicked users, you will be taken to the user management section. Here you will be presented with the user management table.
This is where you will be able to activate your users.
Note:
The next steps are for activating all users. You may use this process if you would like to send an activation email to all users on the LMS that aren't currently activated.
2. More Actions
To get to the activate all users button you will have to click 'more actions' (hamburger icon) that can be found at the top right of the user management table.

3. Activate All Users
You will then be presented with a drop-down menu with the following options:
- Show disabled users
- Activate selected users
- Activate all users
- Delete selected users
Select the third tab 'activate all users'.
This will activate all users on the LMS that are not already activated. Each user that is not activated on the LMS will receive an activation email.
If you don't want to activate all users and only want to activate a few users - DO NOT click this button.
4. Create
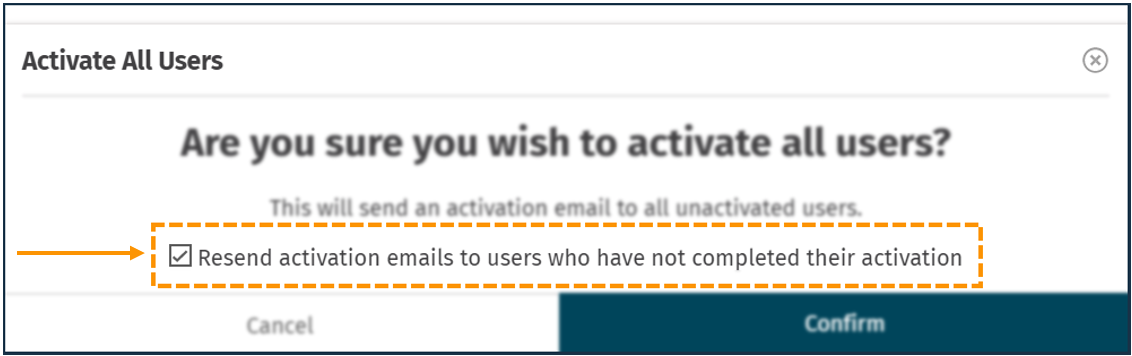
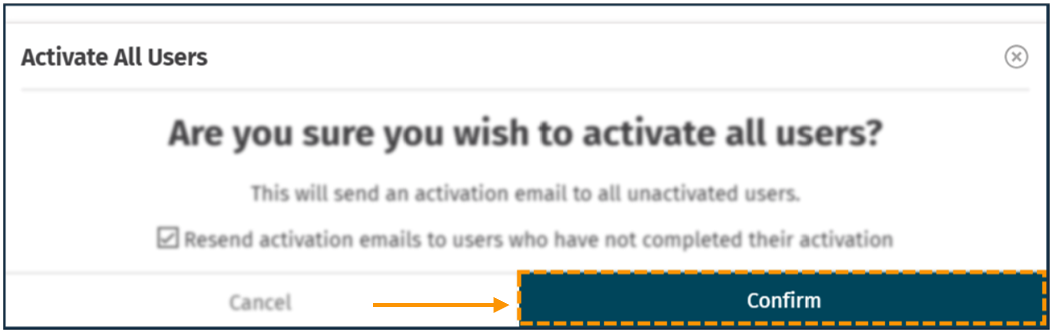
After clicking 'activate all users' you will get a confirmation box asking if you are sure you want to activate all users.
There is a box you can check to 'resend activation emails'. If you check this box all users that haven't completed their activation will get a reminder to activate their account.
In this example, the box is ticked.
5. Confirm
After you have decided if you want to select the 'resend activation email click 'confirm' to finish off the process of activating all users.
Enjoyed using our product?
Help us out by leaving a review for on Gartner Peer Insights!
It only takes 5 minutes of your time and every review helps us immensely to reach new clients. Thank you so much.